What is a Source?
In Airfold, a Source is the foundational storage unit, comparable to a table in a traditional database. It stores structured data in rows and columns based on a predefined schema and serves as the entry point for data ingestion into the platform. Once data is ingested, it’s stored in a Source and made immediately available for querying with SQL. Sources power all downstream transformations and API endpoints in Airfold, making them a critical part of your analytics workflow. They are designed for speed, schema clarity, and reliability, helping ensure your data remains fresh, queryable, and production-ready.Ingesting Data into a Source
To ingest your data into a source, you have two options:Airfold Connectors
Seamlessly sync data from your existing systems into Airfold using built-in connectors for platforms like S3, Postgres, or Snowflake. Ideal for scheduled or high-volume ingestion.
Airfold API
Push data directly to Airfold in real time using our API. Instantly populate your Source and begin querying; perfect for syncing event data as it happens, with no batching required.
Schema
Each Source has its own schema that defines the table’s columns, data types, and table settings.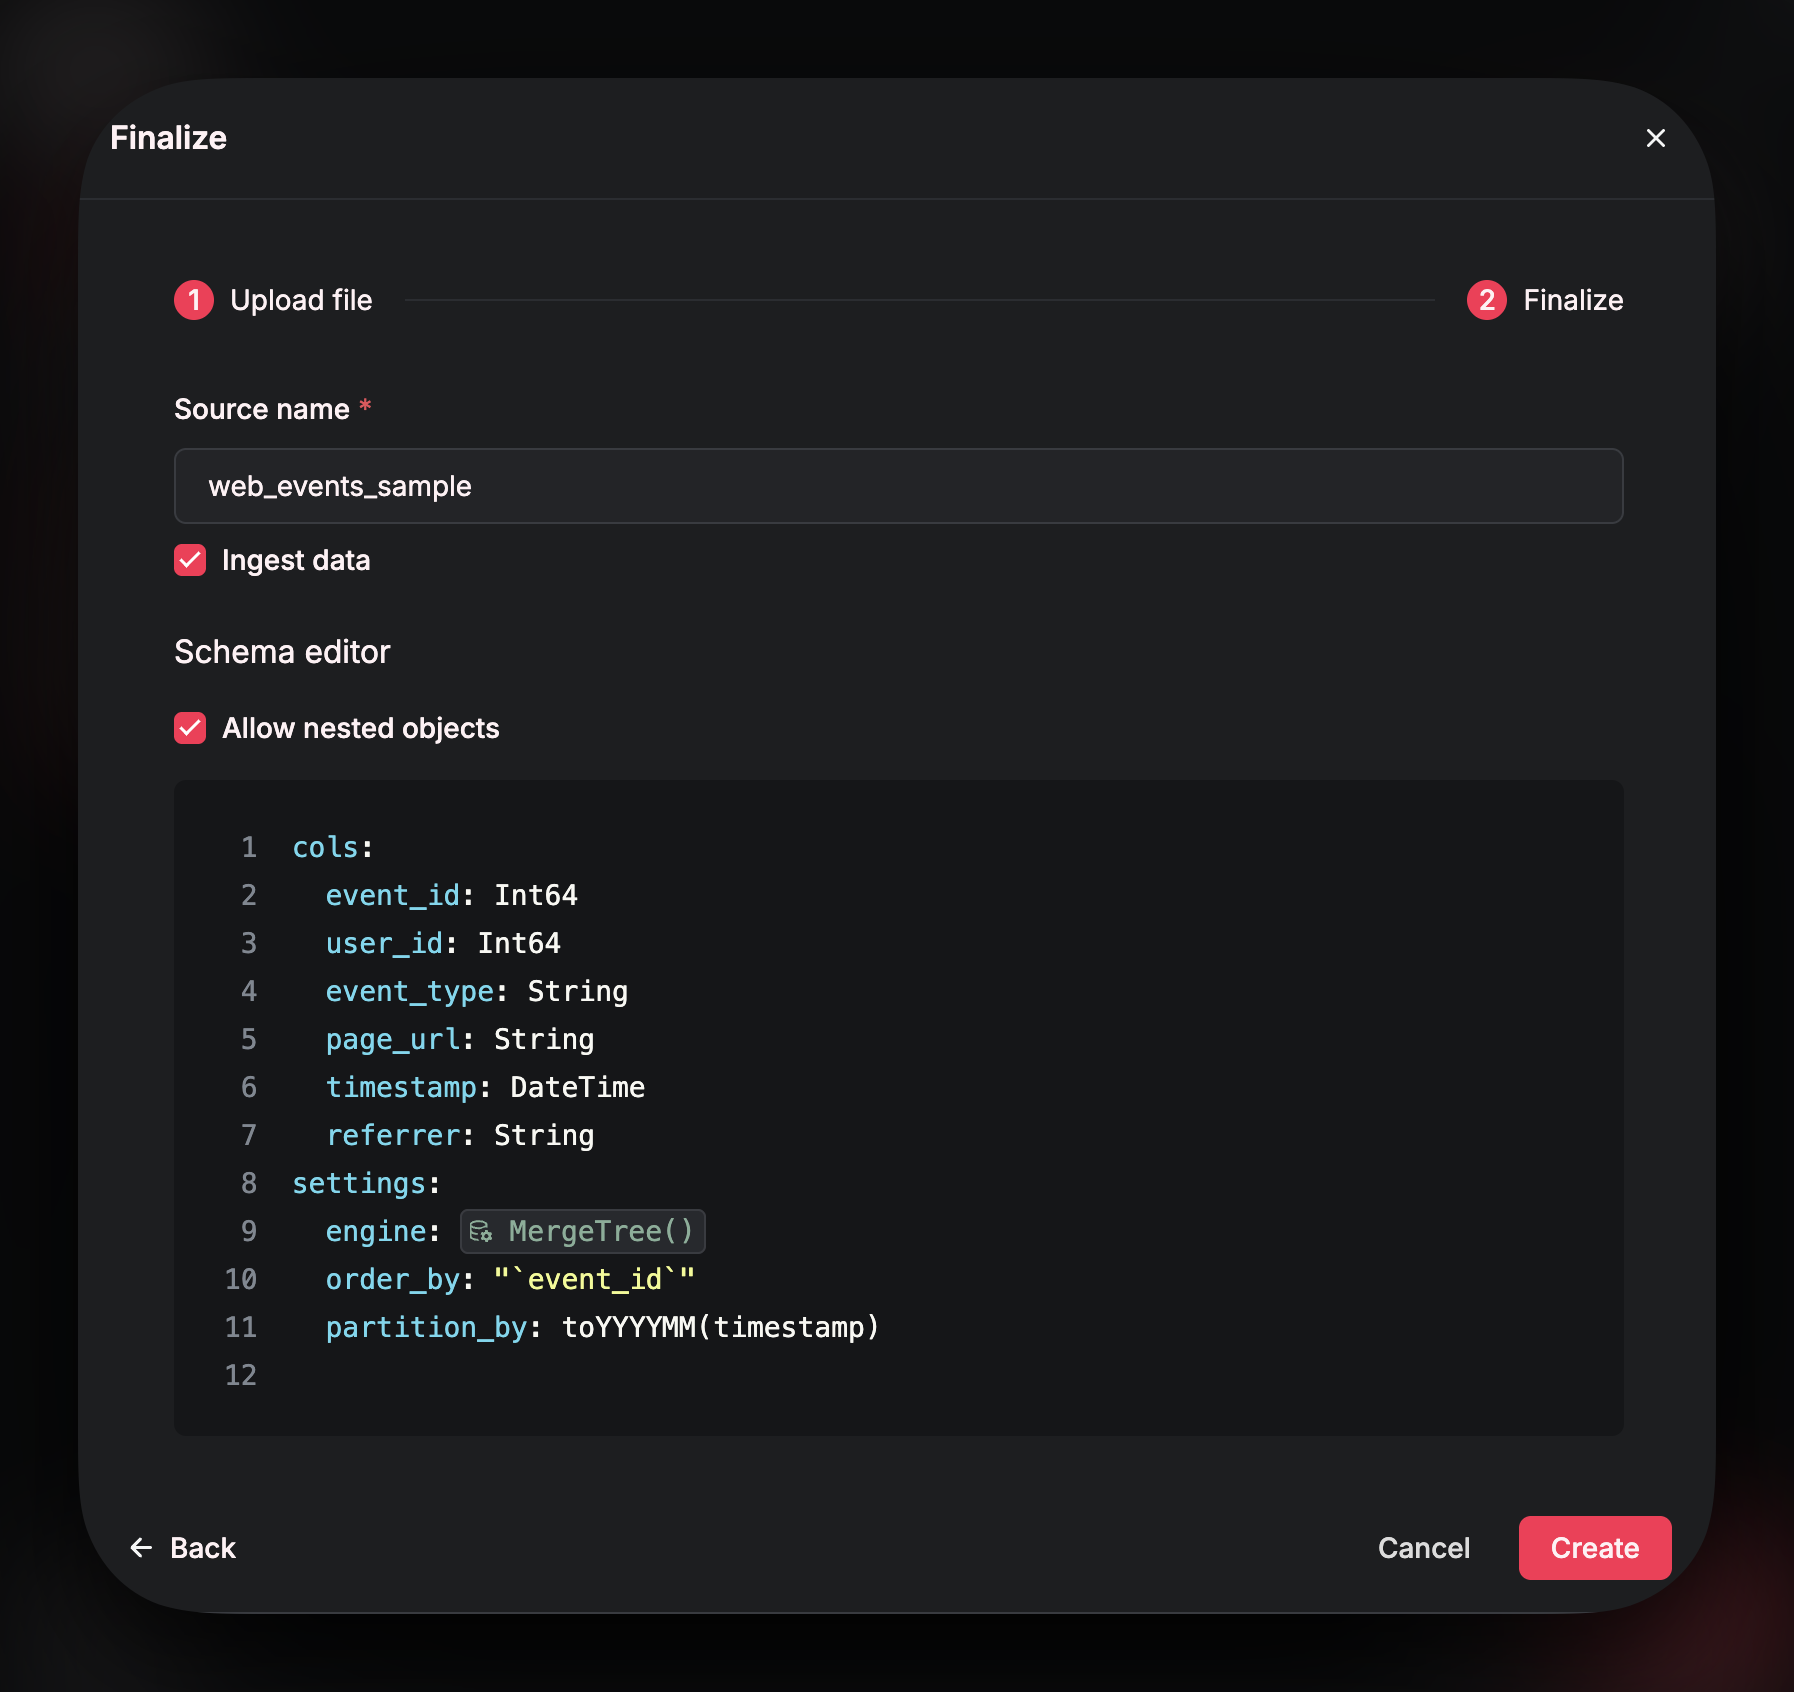 Defining a clear, well-structured schema for your Source is key to ensuring fast, efficient queries with minimal latency and resource usage.
There are several Airfold specific things that you need to consider when finalizing your schema such as:
Defining a clear, well-structured schema for your Source is key to ensuring fast, efficient queries with minimal latency and resource usage.
There are several Airfold specific things that you need to consider when finalizing your schema such as:
-
Table settings
- Each Source must have an
engine type(required) - The
Primary Keydefines how data is stored on disc (required) - Table
Partitions- Used mainly for data management (optional)
- Each Source must have an
-
Data typesThere are many data types in Airfold that you might not find in other platforms that can help to cut down on storage cost and query efficiency.
Creating a Source
To create a source, you can either use the Airfold UI (simplest and quickest method) or you can define your Source details in YAML files and then push to your workspace using the Airfold CLI. Below we have shared an example of using either method.Creating a Source in the UI
Navigate to “Sources” on the left menu bar, and click on ”+”: From this window, you can either choose to create a Source that uses a connector or to create a Source that will infer a schema from a text snippet, a file upload, or an external URL.
💡 Tip:
If you plan on ingesting data using the Airfold API, you need to create a source without a connector. Selecting the Text option in this window will allow you to create an unconnected Source, but still define its schema - ready for data to be ingested into.
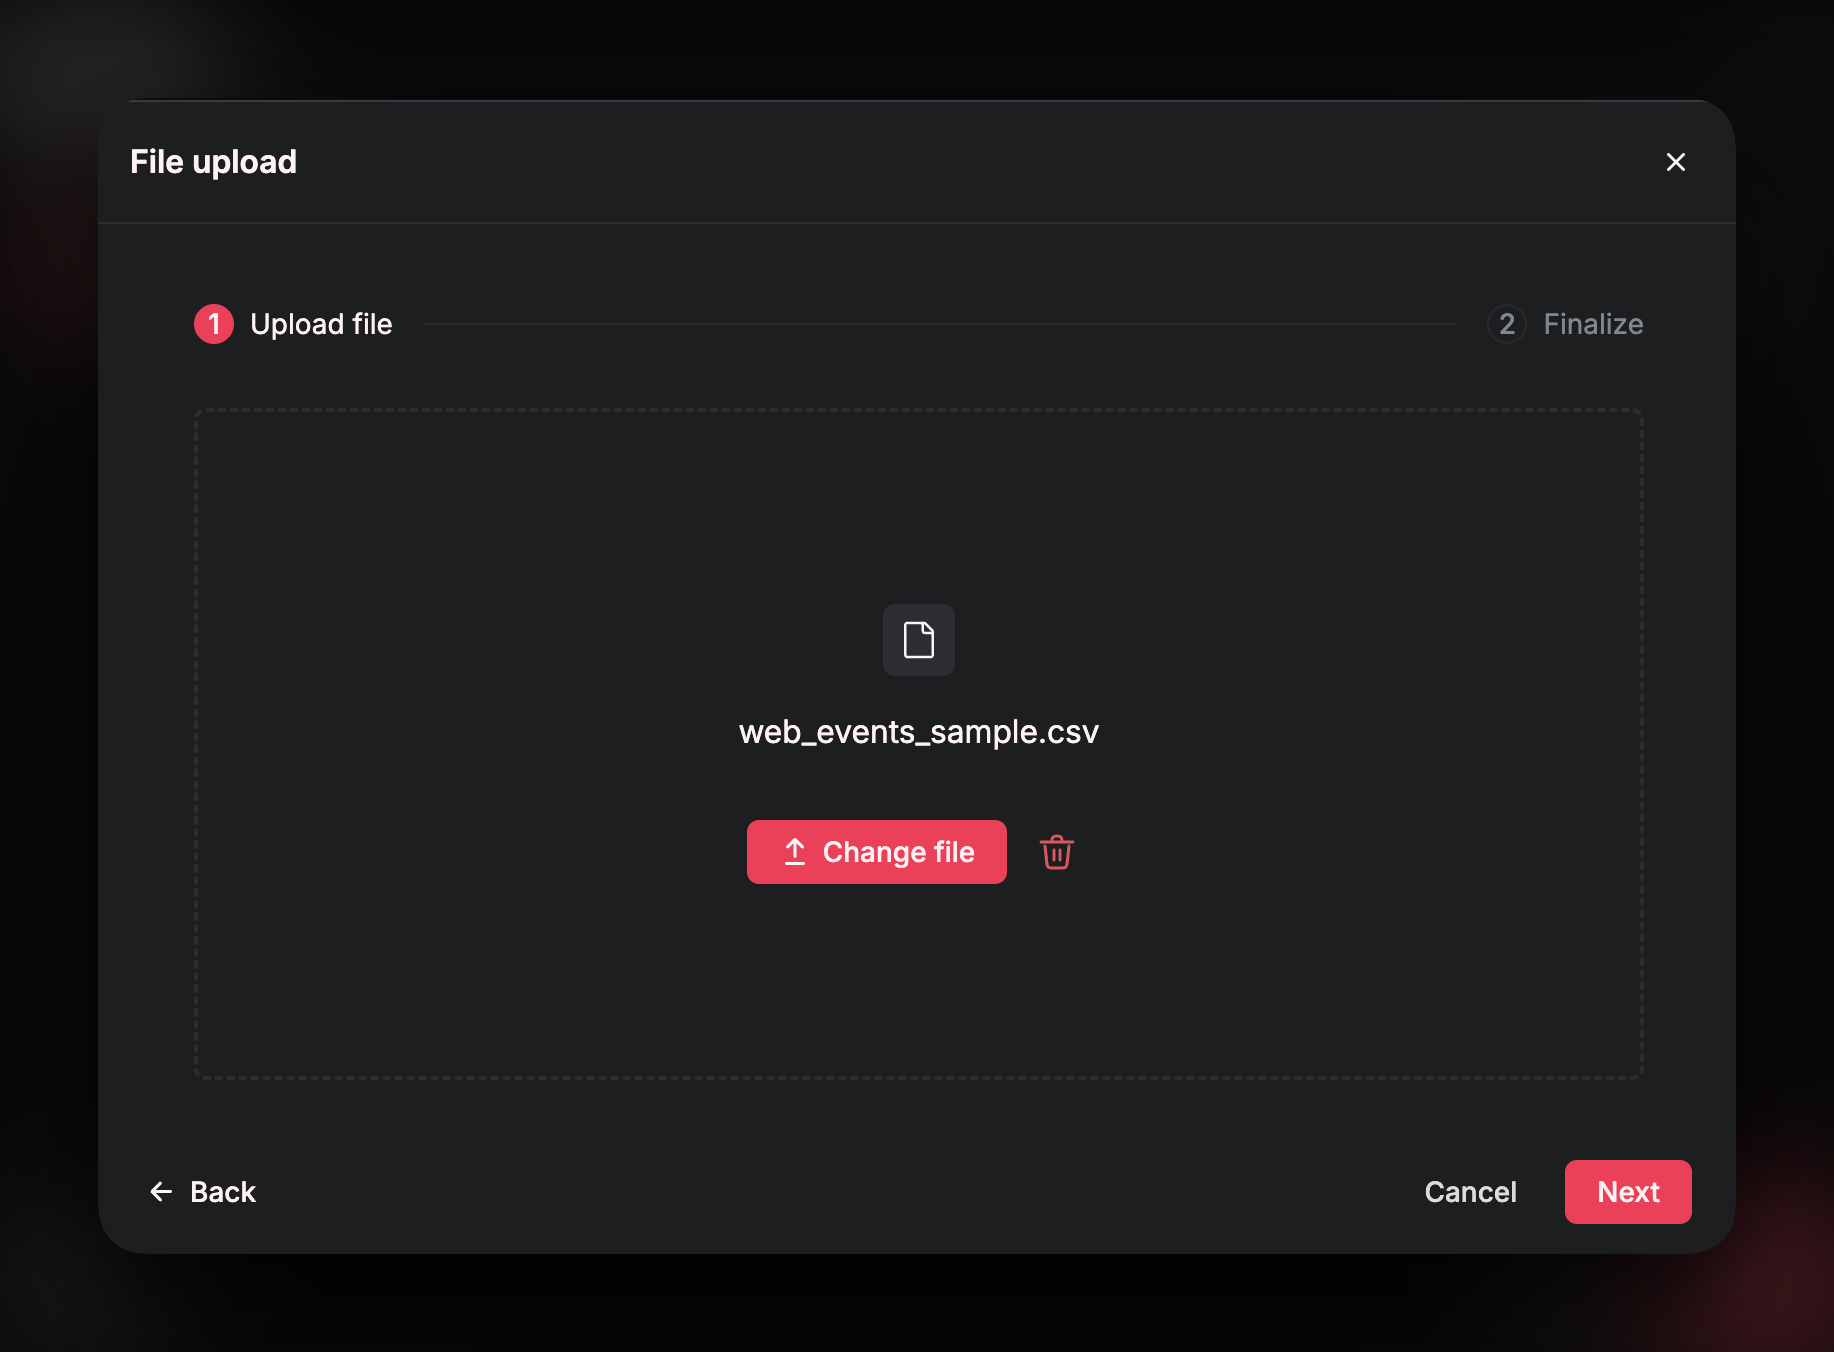
Below is an example of creating a Source using a file upload. This will create an unconnected Source that will infer its schema from the file uploaded. You can choose whether or not to actually ingest the data from the file OR to just use the file as a means of inferring a schema.
Upload a File
After clickingFile Upload, you will be asked to specify the file.
Confirm Schema
On the next page, you can confirm theName of your Source. The Source name is how you will reference your data in your SQL queries - so make sure to select a SQL-friendly name!
You can also choose whether or not to actually ingest the data from the file (or just infer its schema). Check the box if you want to ingest the data from the uploaded file into your Source.
In this window, you can also modify the schema and the table settings. You can update names of columns, data types, engine type etc. Refer to the schema page of these docs for best practices.
Click Create to finalize the Source.
UI Features
Once your source is successfully created, the UI has several tabs that allow you to see useful information: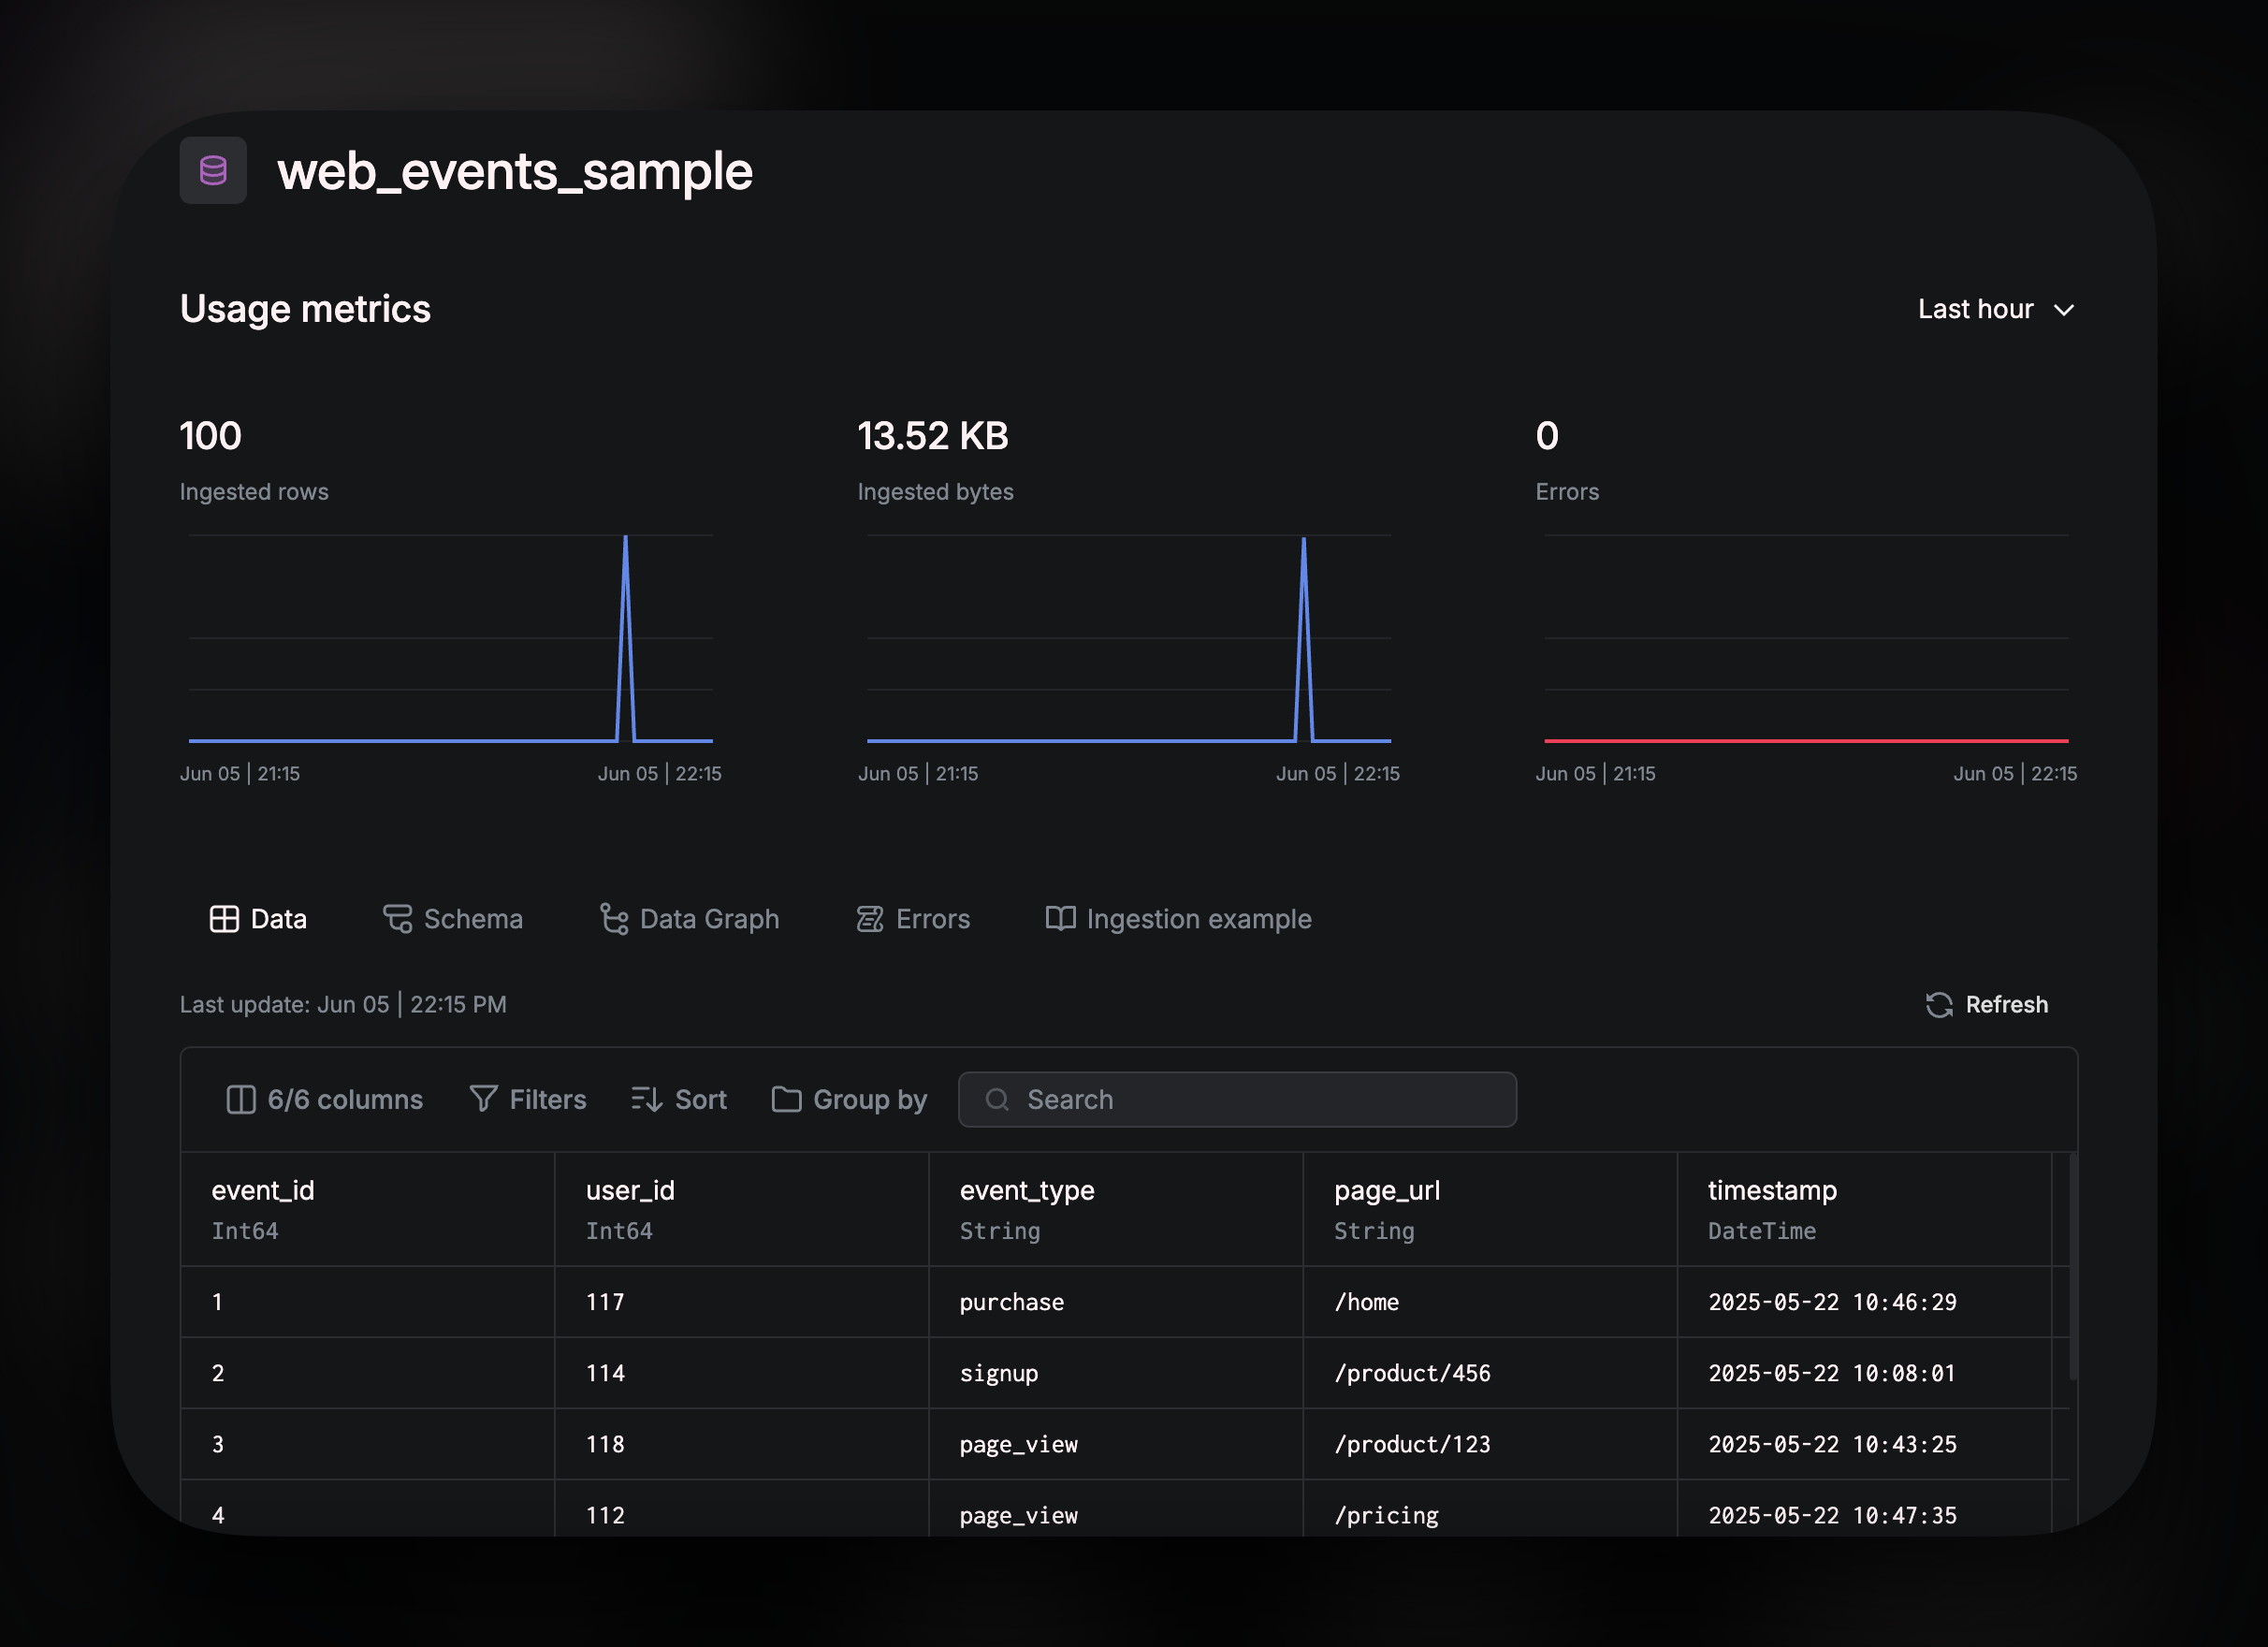 The graphs at the top of the page show your
 Usage metrics so that you can monitor your key Source metrics. The tabs below the graph:
Data
Gives you a preview of your data. You can explore the data by using:
Filtersallow you to filter out certain rows based on a conditionSortcan be used to order your rows in ascending/descending order based on a specified columnGroup byis for organizing your rows by a specified column, grouping related rows together based on a shared value in that column
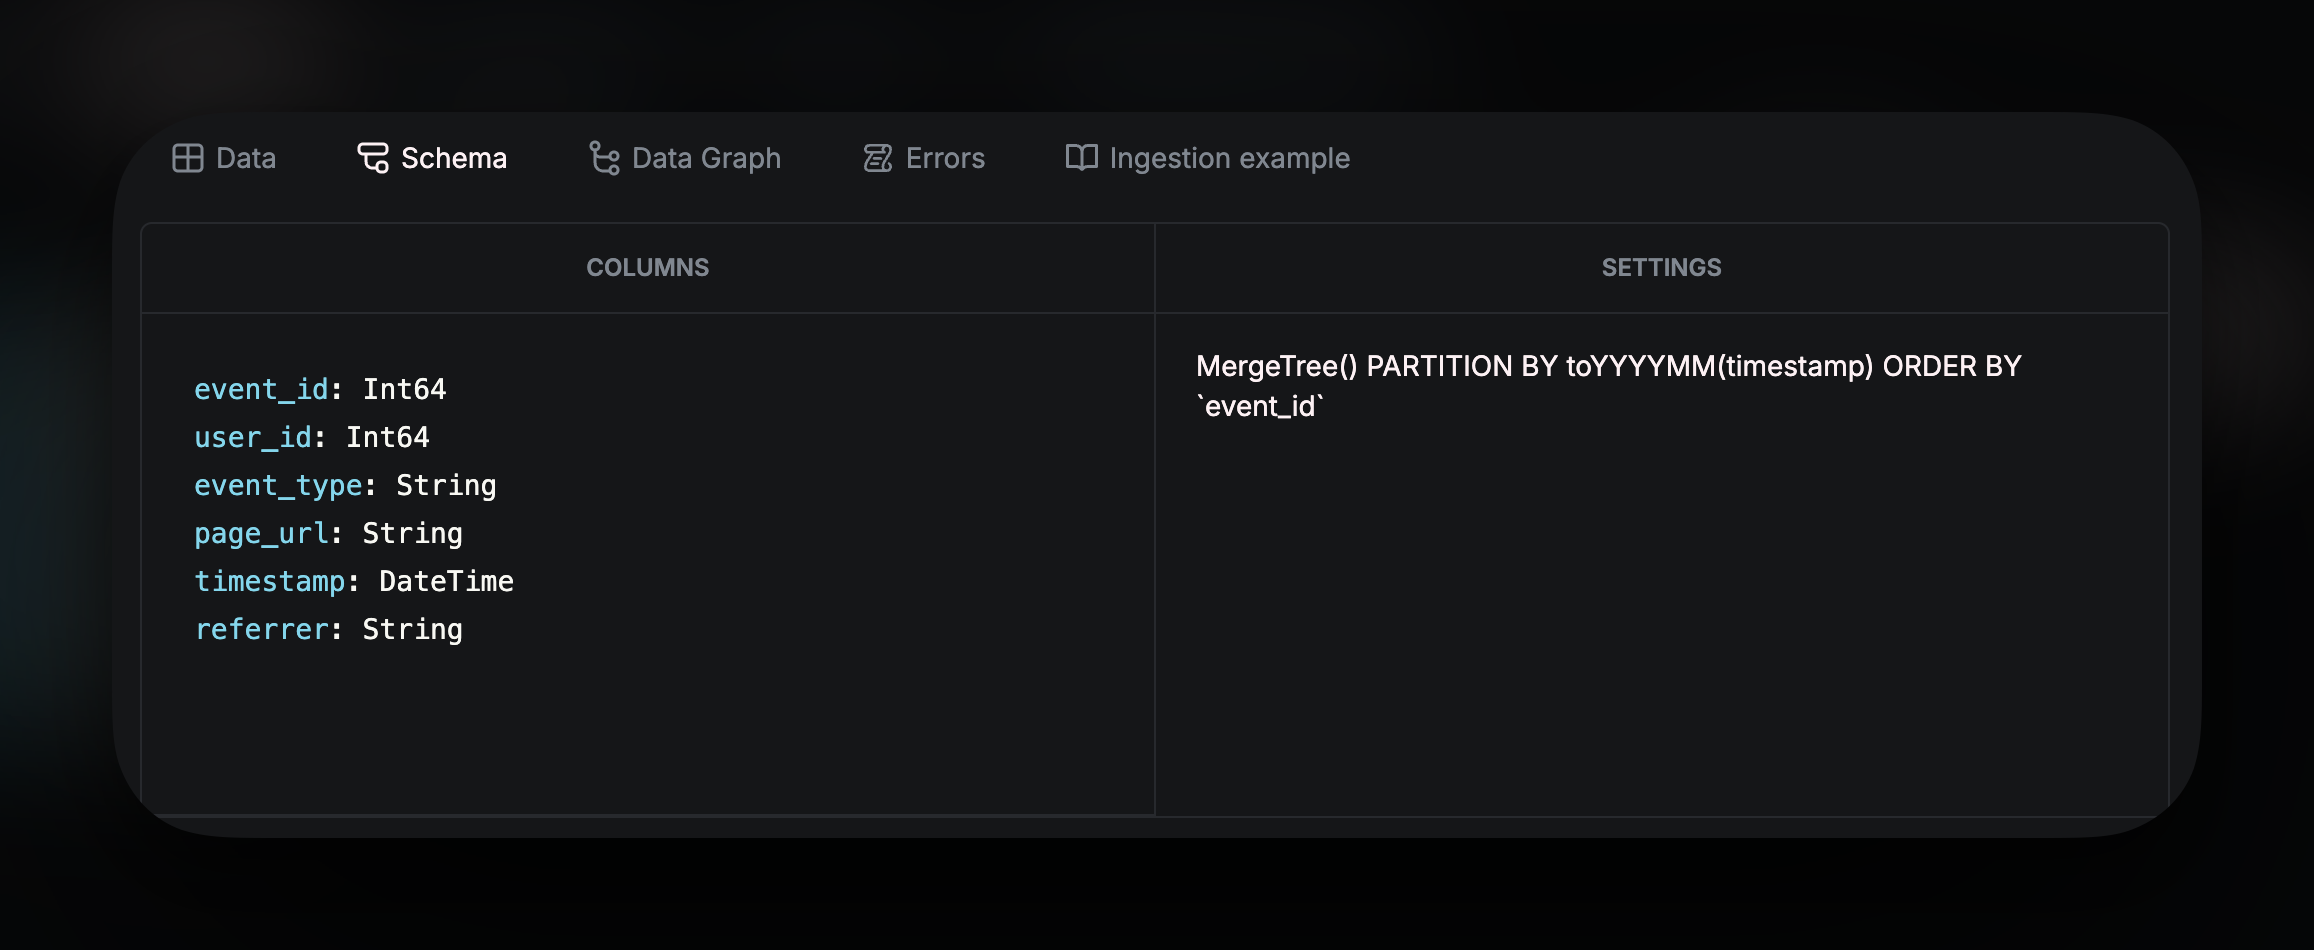
Schema provides the table schema and ClickHouse settings.
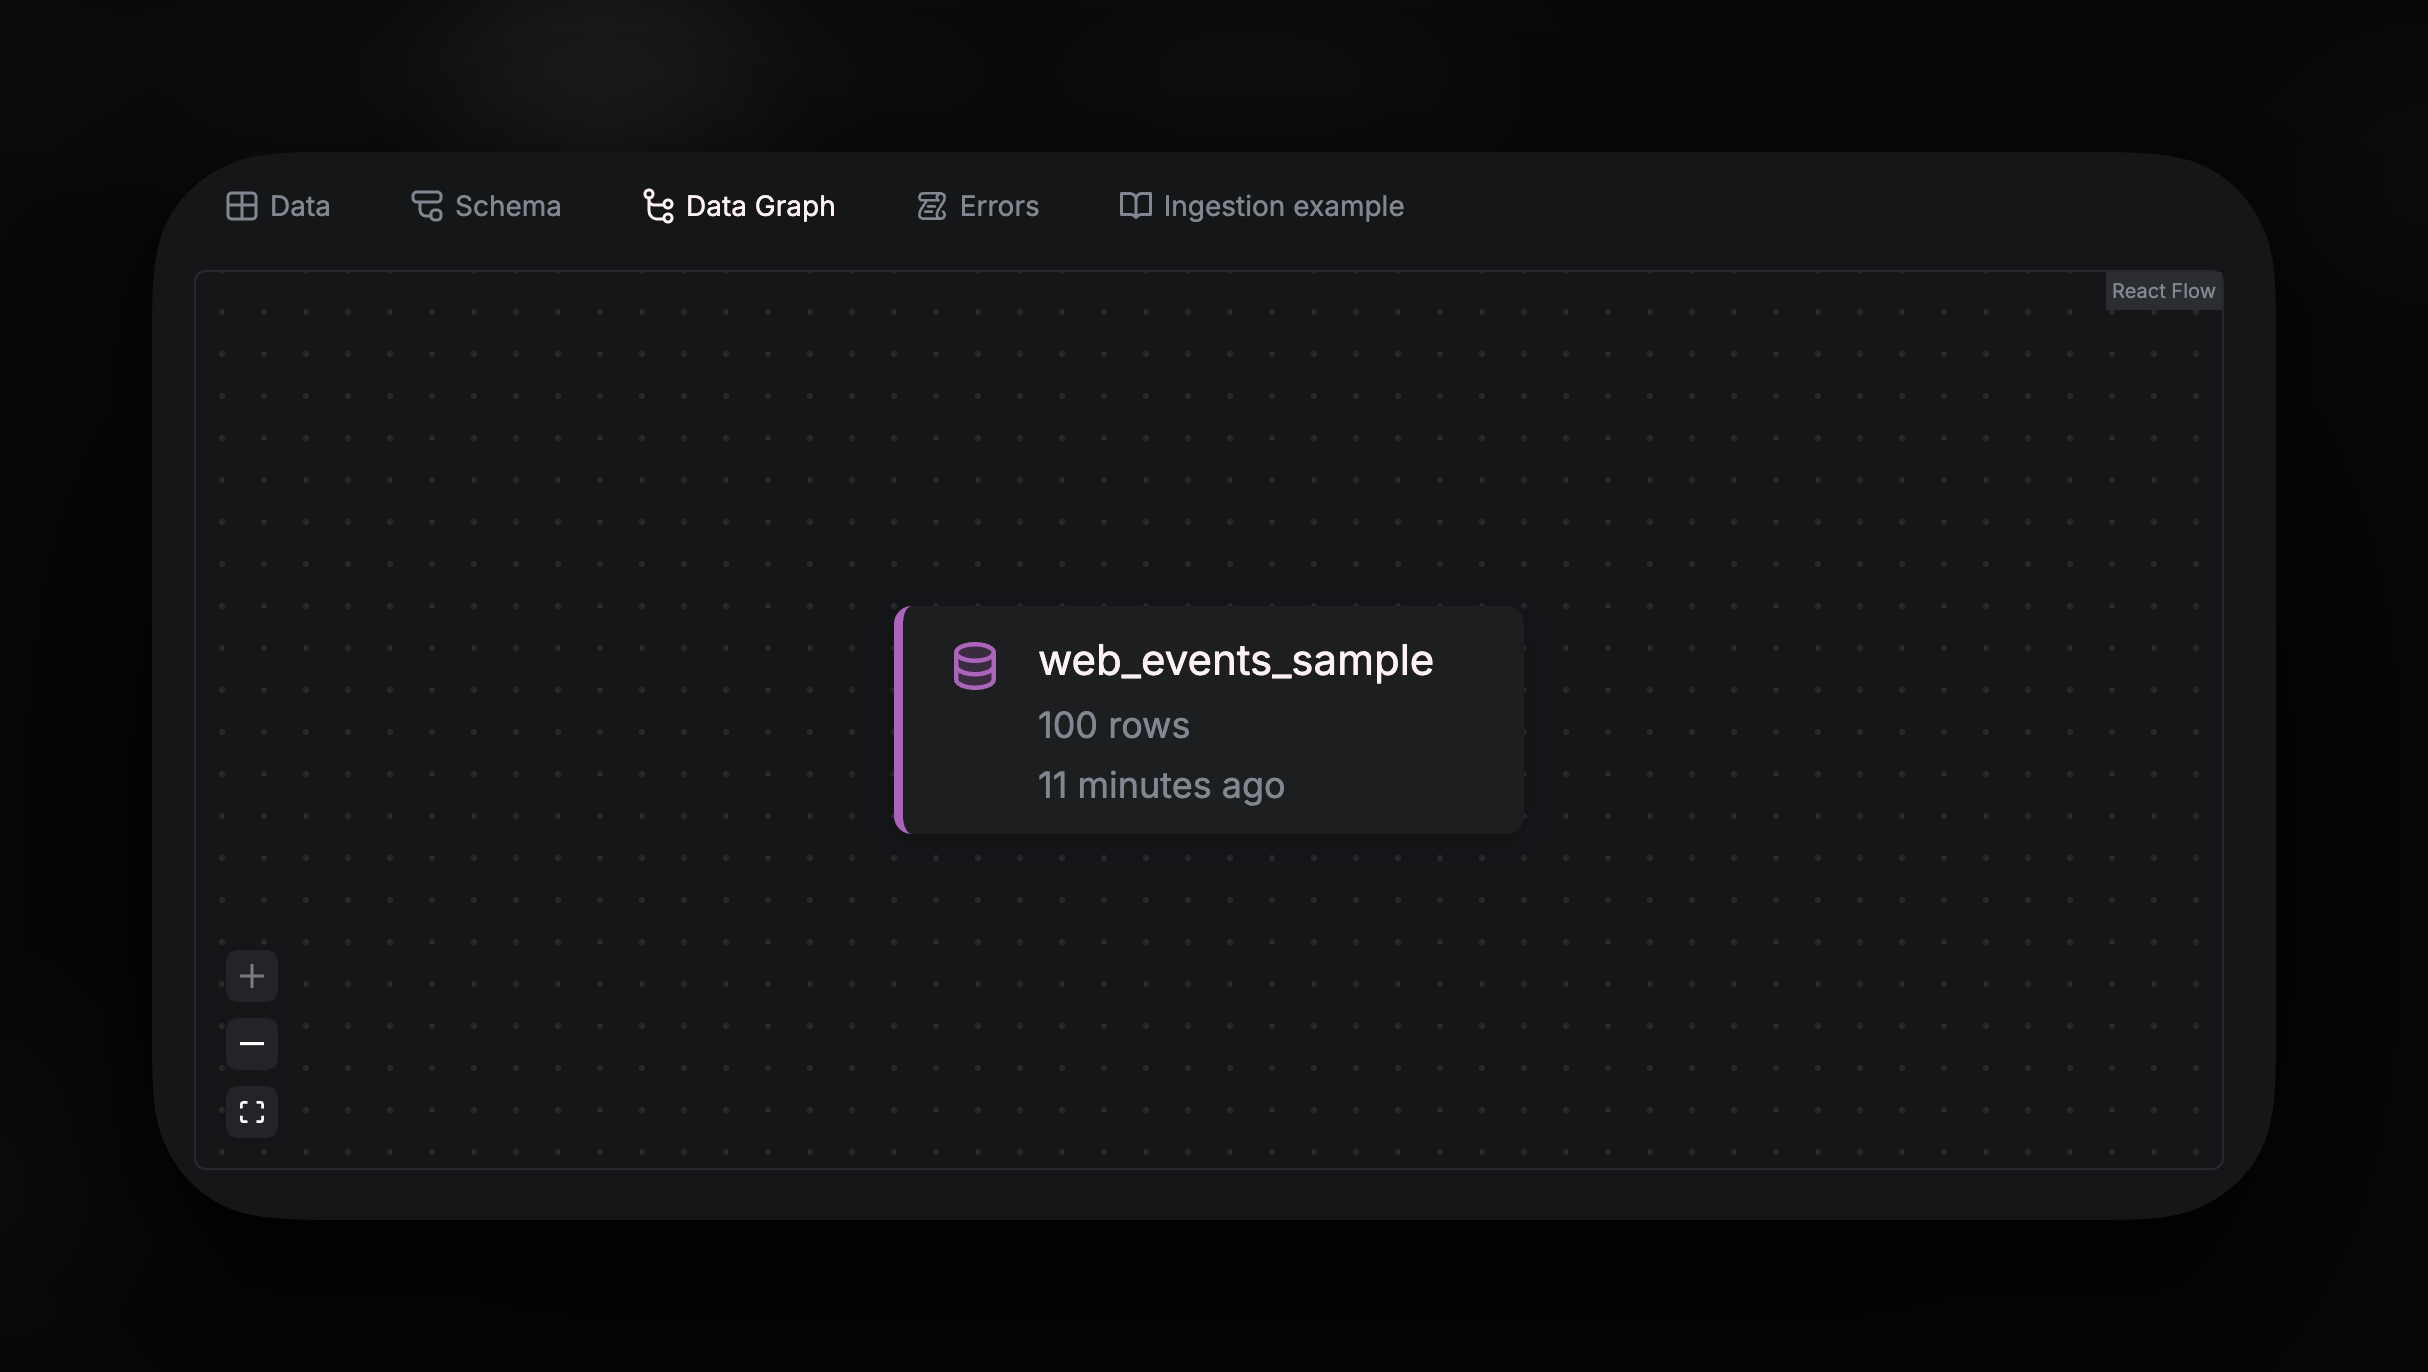
Data Graph shows all the dependencies for the Source. As you build downstream analytics from the Source, using Pipes, the dependency chart will populate showing all nodes that reference this source.
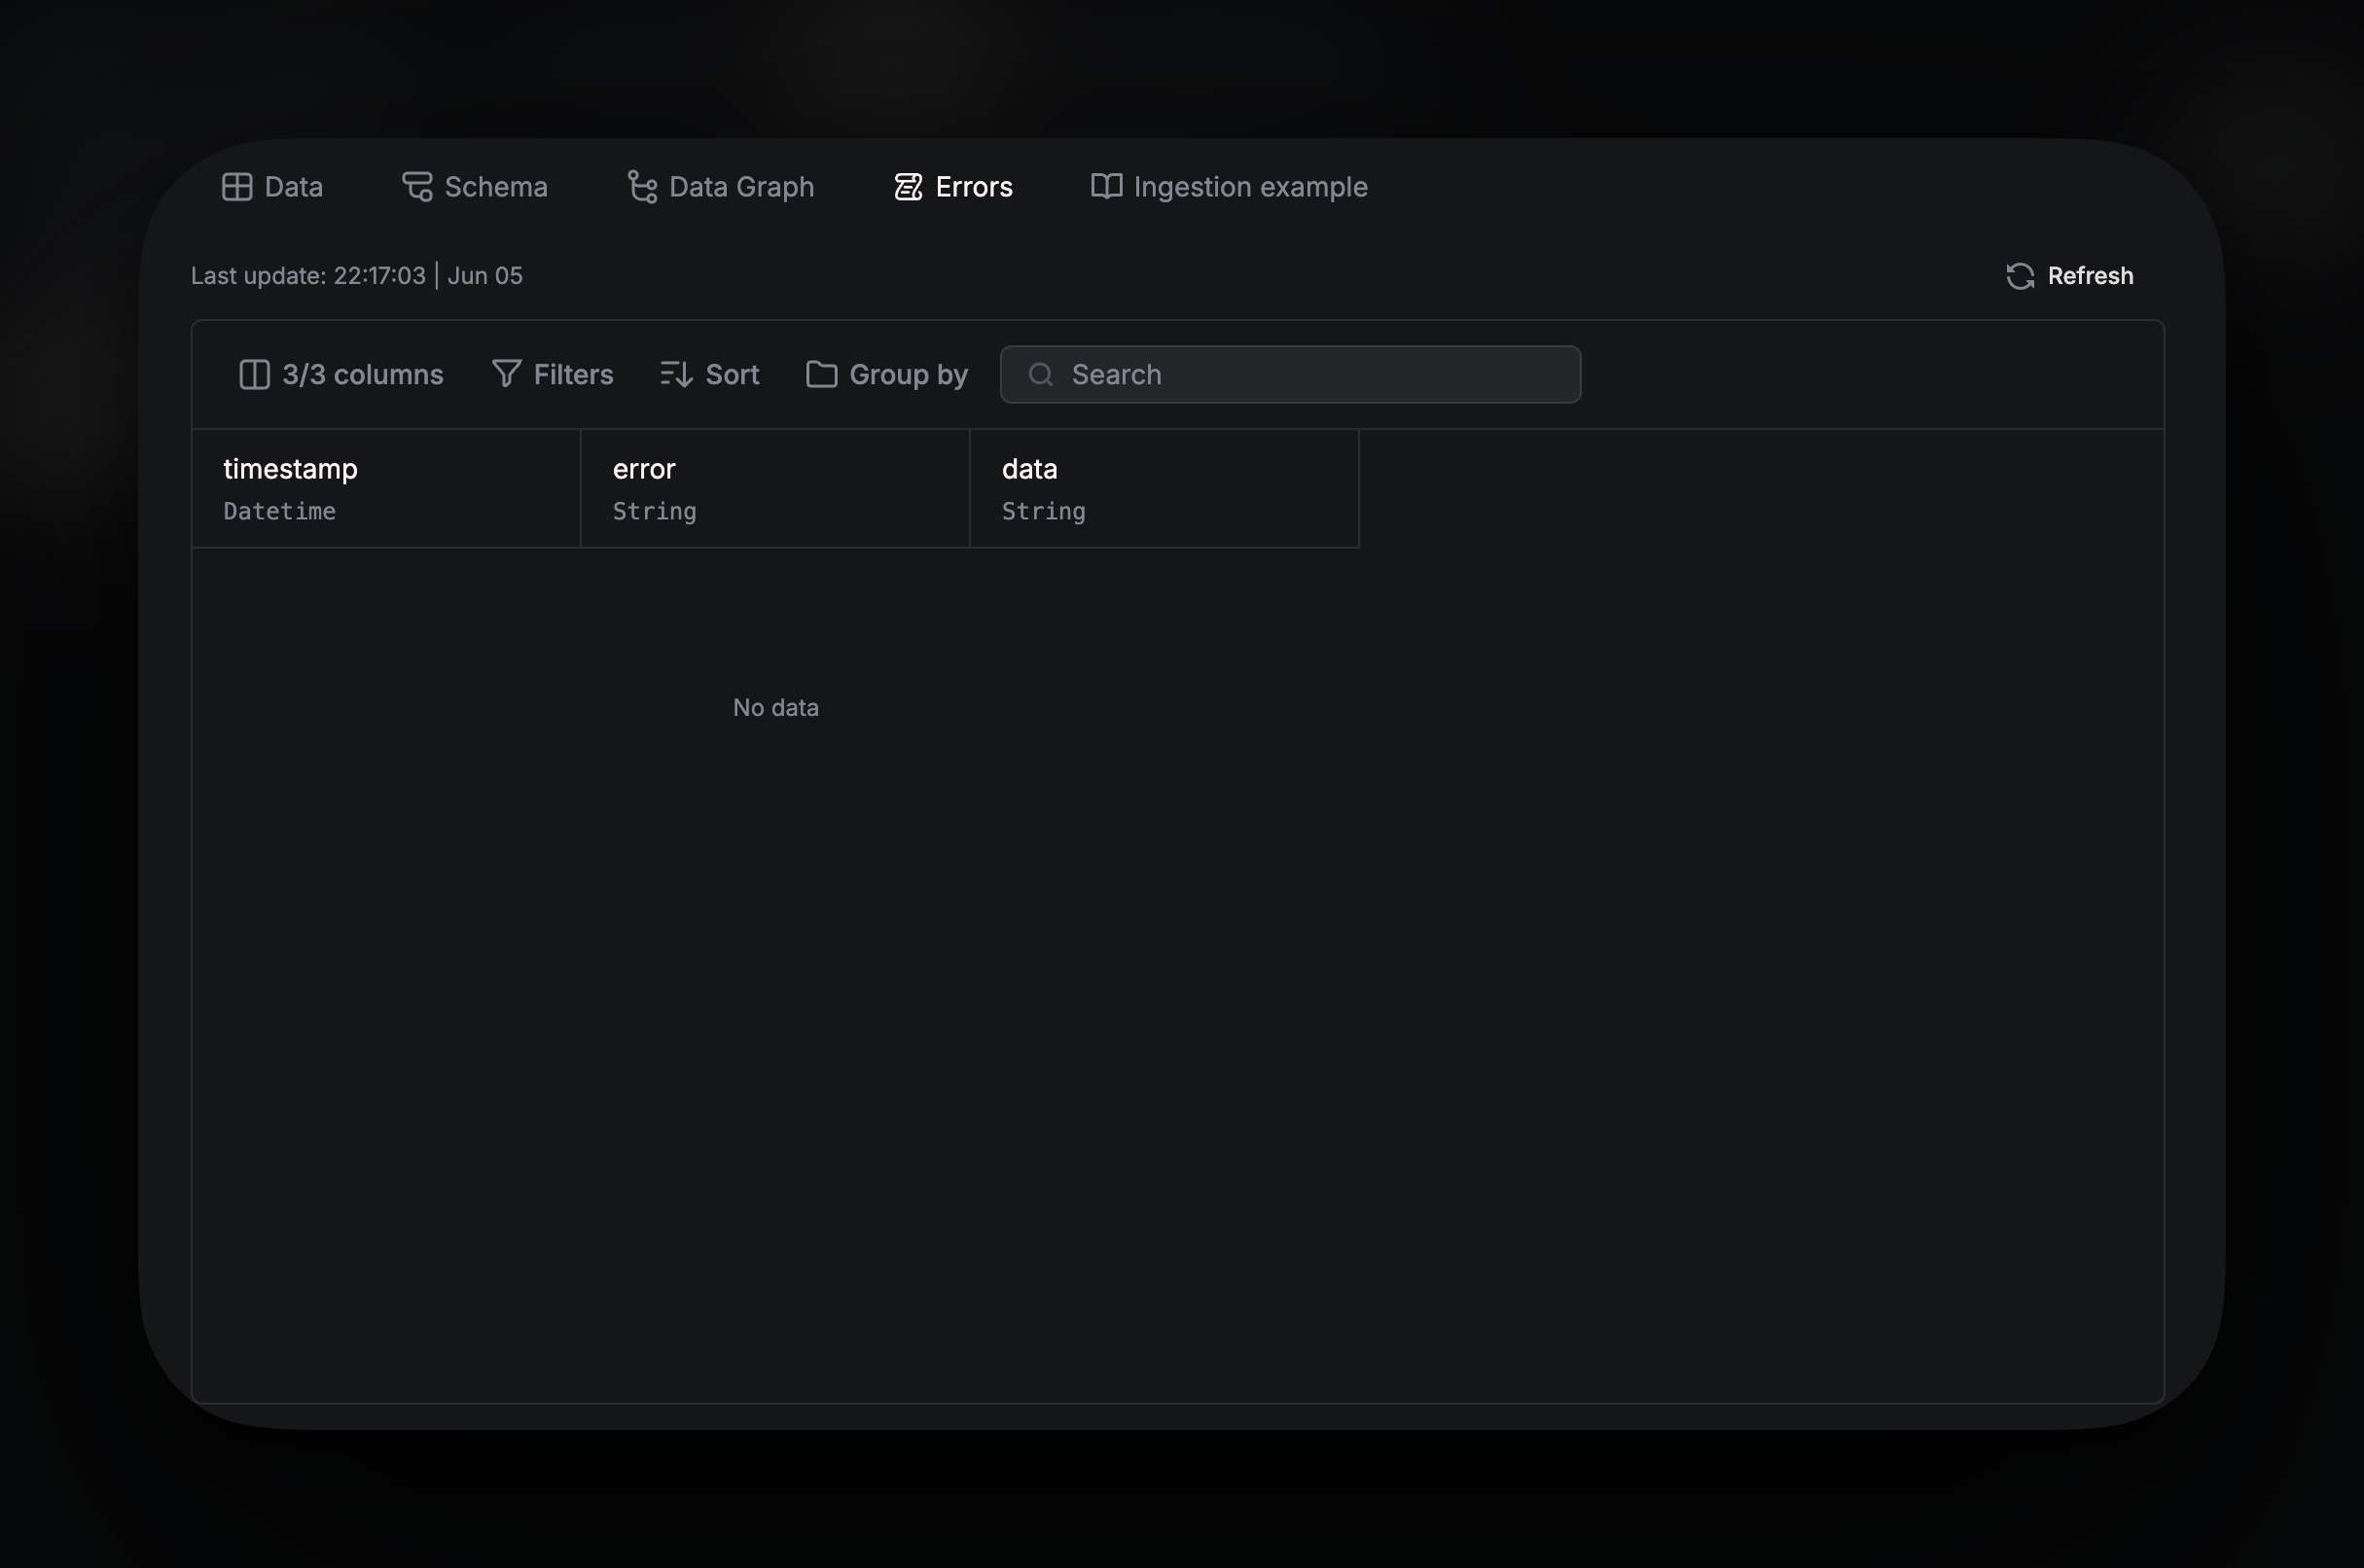
Logs provides error logs. Any ingestion errors can be seen there.
Creating a Source with the CLI
Creating a YAML file
If you are using the CLI, Sources are defined with YAML files - usually in your/Sources directory. For a Source that isn’t using a connector, your YAML should look like this:
web_events.yaml
Properties
The type of table that gets created. For Sources that don’t use connectors, this value should be
TableThe name given to the Source
A brief overview of the source’s content or purpose (optional)
Defines the schema of the source as a list of columns where each column name
is a key and its data type is the value (see Data
Types)
Engine Types
for the source, which can include
ORDER BY, PARTITION BY, Table Engine,
etc. The settings can be a String, a key-value pair, or an array comprising
either or both. Optional.Push
Push sources to your workspace using the CLI commandaf push.
For example, to push web_events.yaml, run: